Jonas Helming, Maximilian Koegel and Philip Langer co-lead EclipseSource, specializing in consulting and engineering innovative, customized tools and IDEs, with a strong …
Eclipse Target Platform Definition DSL and Generator
Target Platform definitions are a way to define from where Eclipse-based projects obtain their dependencies. They provide many benefits, but in case you still need more convincing please see this tutorial.
However, defining, updating, and especially applying target platform definitions in Eclipse-based projects has always been extremely cumbersome. There are two main reasons for this:
First, typical target platforms are a complex configuration of third-party bundles, which sometimes enhance with custom bundles. If any of those dependencies misbehave, bundles do not fit together, features are misconfigured, or specified source locations (i.e. update sites) are not available and loading the target platform fails. This issue can be mitigated, by mirroring the referenced locations and applying a decent process in terms of versioning. The Eclipse release train helps a lot in defining a compatible set of bundle versions. However, at the end of the day, configuring a functioning target platform is still inherently conceptually complex. If you have ever configured a package.json, you probably agree with this statement.
Second, the default tooling for defining a target platform in Eclipse is … let’s phrase it like this: there is room for improvement! Yes, we are talking about this editor:
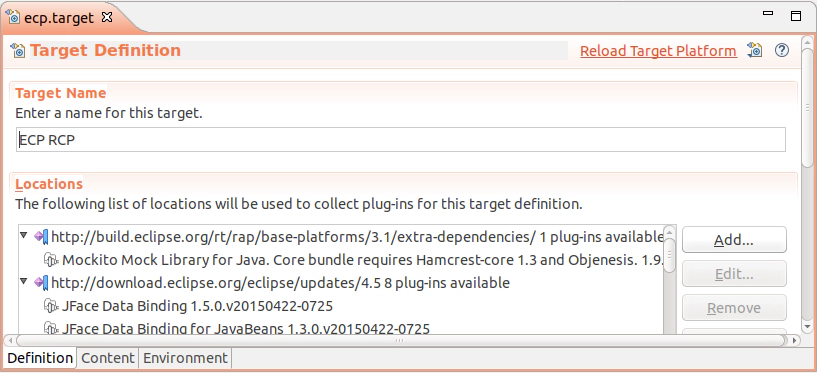
To this point, there are two major issues. First, the editor triggers the resolving process of the target platform directly on opening - which often takes a long time. Second, you select the contents in a modal dialog, which is not prefilled with the previous selection.
Luckily, there is an alternative to this editor, even without switching your whole toolchain to something like Bnd tools. Michael Barbero has published a simple DSL to specify a target platform and an editor supporting this (see the targetplatform on github).
The tooling provides 4 major features:
- Editing the target definition
- Validating a target definition
- Setting the target platform (in the IDE)
- Generating a .target file (i.e. original target definition), e.g. to be consumed by a Tycho build.
Editing a target platform is very simple and much more efficient as the default tooling. After installing the tool into your IDE (see the targetplatform on github), simply create an new file (New => File) and name it like your former .target file using the extension “tpd”, e.g. “mytarget.tpd”. The file will be opened in the corresponding editor, which provides syntax highlighting and auto-completion for the underlying DSL.
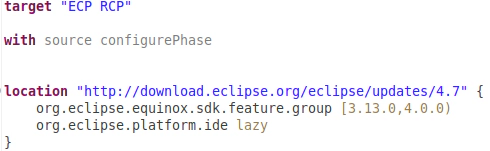
Below you find a simple example of a tpd file. The first statement specifies a name. The “with” statement allows you to configure parameters, e.g. whether source bundles are also included in the target platform, use autocompletion and these descriptions for a detailed overview of the configuration parameters.
Subsequently, you simply need to specify an arbitrary number of source locations (i.e. update sites) and the features/bundles you want to retrieve from those. Please note that after specifying the location, triggering the auto-completion inside the location will show you all available installable units. For every bundle/feature, you can optionally specify a version range. Auto-completion will also assist you in this. Please note, that if you do not specify a version, the latest version will be written to the .target file. If you want to specify “0.0.0” (i.e. latest), you should add “lazy”. If you want to ping the version down, use a range like this: [1.0.0,1.0.0] (for version “1.0.0”).
Please see this code snippet for real examples of a tpd file from the EMF Forms project.
After defining the target platform, you can use the right click actions “Set as Target Platform” (CTRL+R) to apply the definition in our IDE. In our experience, this works much more reliably than triggering it from the default editor.
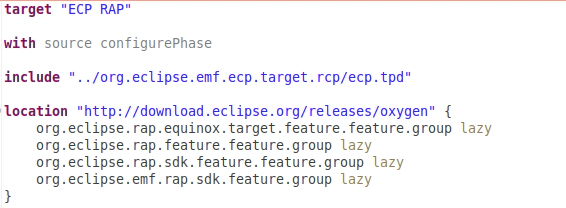
A very interesting additional feature is to include other .tpd files. This way, you can specify your target in a modular way. A common .tpd file contains all regular dependencies, other .tpd files can include additional dependencies, e.g. for a RAP target based on the regular RCP target (see example below). The include feature makes it much more comfortable to deal with different configurations and maintain several target definitions.
Finally, you still might require a .target file, e.g. for your build. This can be created from the tpd file using the action “Create Target Definition File”, you do not even have to open the .target file. Our recommendation is to make the tpd file authoritative, meaning it only allows modifications here and only generates the .target file if anything has changed.
This can be part of the build, in this case, you can delete the .target file from your repository. Please see the targetplatform on github for documentation on how to do this using a headless application. This option has currently one drawback: Tycho resolves the target very early in the build (see this bug). Therefore, we are not able to trigger the target generation in the same build before Tycho requires the existence of the .target file. A work-around is to separate the target generation and call maven twice (first to generate and then the regular build).
Finally, migration from an existing .target file to tpd is pretty simple. The best way is to open the .target file with a text editor and migrate the xml node containing the installable units and repository urls to the new syntax. Remember to transfer the version ranges and replace version “0.0.0” with lazy. It is worth it to keep the exact same order of repositories and IUs while migrating, because you can then very easily diff the changes on the .target file after generating it from tpd. The only thing which may change is the order of parameters for locations.
Migrating a regular .target file is maybe 15 minutes of work. Subsequently, you might save hours of frustration when working with the default tooling, so in our experience, the migration very quickly pays off. The tooling itself works great and also greatly improves the process of specifying and updating a target platform definition.
As the described tooling is not part of any regular Eclipse package, we have made it part of our EclipseSource Oomph Profile, so if you use this, the tool will automatically be included into your IDE.
Finally, we want to thank Mikael Barbero for this great improvement and hereby publicly ask him to consider moving the tool to PDE, or at least make it part of the release train :-)
More information and useful documentation can be found on github.