Jonas Helming, Maximilian Koegel and Philip Langer co-lead EclipseSource, specializing in consulting and engineering innovative, customized tools and IDEs, with a strong …
JSON Forms - Day 5 - Layouts
JSON Forms is a framework to efficiently build form-based web UIs. These UIs are targeted at entering, modifying and viewing data and are usually embedded within an application. JSONForms eliminates the need to write HTML templates and Javascript for manual data-binding to create customizable forms by leveraging the capabilities of JSON and JSON schema as well as by providing a simple and declarative way of describing forms. Forms are then rendered within a UI framework – currently based on ReactJS and Redux. If you would like to know more about JSON Forms the JSON Forms homepage is a good starting point.
In this blog series, we would like to introduce the framework based on a real-world example application, a task tracker called “Make It happen”. On day 1 and day 2, we described the overall requirements as well as created a fully working form for the entity “Task”. On day 3 we showed how to extend the form with new attributes and controls. On day 4 we introduced rule-based visibility of controls, based on the data the user has entered.
If you would like to follow this blog series please follow us on Twitter. This is where we will announce every new blog post regarding JSON Forms. After the first four days, the current form looks like this:
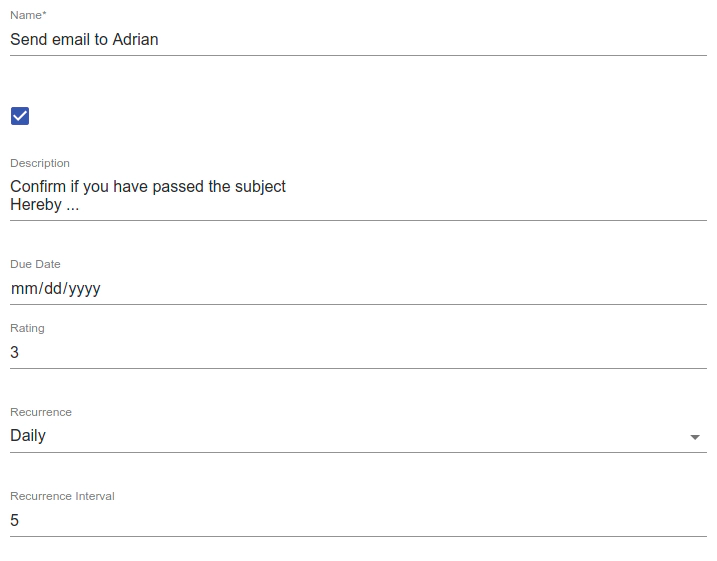
While the form is already fully functional, including data binding, validation, and even rule-based validation, the layout is definitely not optimal. Basically, we just see a vertical list of all controls. Therefore, in this blog post, we want to refine the layout using the JSON Forms layout elements.
So far, we have embedded all controls into one root “VerticalLayout”. This type of layout always arranges its children vertically. However, JSON Forms also supports different layout types, e.g. “HorizontalLayout”. Of course, those layouts can be combined by embedding one layout element into another. For example to achieve a two column layout you can use a “HorizontalLayout” element which contains two “VerticalLayout” elements.
In our current form, we could save some vertical space by putting the “dueDate” attribute in one shared “HorizontalLayout” with the “rating” property. The same applies for “recurrence” and “recurrenceInterval”.
The resulting UI schema looks like this:
{
  "type": "VerticalLayout",
  "elements": [
    {
      "type": "Control",
      "label": false,
      "scope": "#/properties/done"
    },
    {
      "type": "Control",
      "scope": "#/properties/name"
    },
    {
      "type": "HorizontalLayout",
      "elements": [
        {
          "type": "Control",
          "scope": "#/properties/dueDate"
        },
        {
          "type": "Control",
          "scope": "#/properties/rating"
        }
      ]
    },
    {
      "type": "Control",
      "scope": "#/properties/description",
      "options": { "multi": true }
    },
    {
      "type": "HorizontalLayout",
      "elements": [
        {
          "type": "Control",
          "scope": "#/properties/recurrence"
        },
        {
          "type": "Control",
          "scope": "#/properties/recurrenceInterval",
          "rule": {
            "effect": "HIDE",
            "condition": {
              "scope": "#/properties/recurrence",
              "expectedValue": "Never"
            }
          }
        }
      ]
    }
  ]
}
So by simply moving things around a bit in the UI schema, we can produce the following layout:
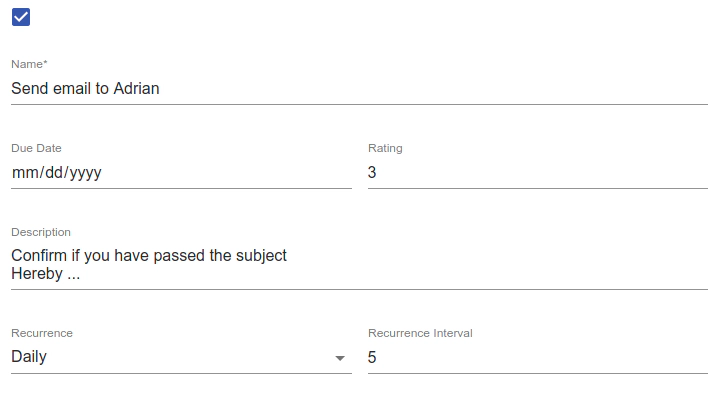
As you can imagine, it is pretty easy to produce more advanced layouts by just combining layout elements.
Please note that JSON Forms supports more layout types than horizontal and vertical. As an example, you could use the element “Categorization” to separate controls into several sub categories. The following screenshot shows a rendered categorization element, where the attributes of a task are split into two tabs. Please note that the horizontal layout described before is now nested into the categorization.


The UI Schema for this layout is as follows:
{
  "type": "Categorization",
  "elements": [
    {
      "type": "Category",
      "label": "Main",
      "elements": [
        {
          "type": "Control",
          "label": false,
          "scope": "#/properties/done"
        },
        {
          "type": "Control",
          "scope": "#/properties/name"
        },
        {
          "type": "Control",
          "scope": "#/properties/description",
          "options": { "multi": true }
        }
      ]
    },
    {
      "type": "Category",
      "label": "Additional",
      "elements": [
        {
          "type": "HorizontalLayout",
          "elements": [
            {
              "type": "Control",
              "scope": "#/properties/dueDate"
            },
            {
              "type": "Control",
              "scope": "#/properties/rating"
            }
          ]
        },
        {
          "type": "HorizontalLayout",
          "elements": [
            {
              "type": "Control",
              "scope": "#/properties/recurrence"
            },
            {
              "type": "Control",
              "scope": "#/properties/recurrenceInterval",
              "rule": {
                "effect": "HIDE",
                "condition": {
                  "scope": "#/properties/recurrence",
                  "expectedValue": "Never"
                }
              }
            }
          ]
        }
      ]
    }
  ]
}
Please refer to this page for an overview of the available layout elements in JSON Forms.
As you might have noticed, the layout types of JSON Forms are a little different from what you know from HTML or any widget toolkit. As an example, there is no element called “tabbed layout”, but rather, it is called “Categorization”. The reason for this is that the UI Schema of JSON Forms is focussed on describing the structure of the layout rather than the actual rendering. The concrete visualization is the responsibility of the rendering component. This is analogous to the combination of HTML and CSS and allows for flexibility in rendering. As an example, the categorization element described above basically only specifies that a form is split into several categories. The default renderer will translate this information into tabs. However, you could also implement an alternative renderer, which would display categories slightly differently.
Talking about alternative renderers: This is a core feature of JSON Forms! So far, we have just used the default renderer for controls as well as for layouts. In the next post, we will describe how to implement and plug in custom renderers in order to adapt the way in which a form is rendered. So stay tuned!
If you are interested in trying out JSON Forms, please refer to the Getting-Started tutorial. This explains how to set up JSON Forms in your own project and how you can try out the first few steps yourself. If you would like to follow this blog series, please follow us on Twitter. We will announce every new blog post on JSON Forms there. If you need support for JSON Forms or if you are interested in new features, please feel free to contact us.
We hope to see you soon for the next day!
List of all available days to date: