Jonas Helming, Maximilian Koegel and Philip Langer co-lead EclipseSource, specializing in consulting and engineering innovative, customized tools and IDEs, with a strong …
EMF Support for Che - Day 1: Run Che and Import existing EMF project
February 14, 2017 | 4 min ReadIn this blog series, we share our experience with extending Eclipse Che and describe how we have built initial EMF support for the Eclipse Che IDE. In the last blog post, we have described our overall goals and the use case.
In this blog post, we describe the first steps in getting started with Che. Before we start to extend Che, let’s run it and see what’s already there. To get started, let us explore the simplest way to get an existing modeling project into a Che workspace. The modeling project is not yet created by Che, but by an Eclipse Modeling Tools IDE. By importing this existing project, we can see what features are already there and what we are going to need to extend later. As a template project, we will be using the existing “Make it happen!” model (see more details in this blog post). This example model is also shipped with every Eclipse Modeling Tools IDE (don’t confuse the desktop IDE with Eclipse Che here), you can instantiate it with New => Example => “Make it happen: Example Model”. The template project already contains generated code. As we will later want to do this directly in Che, we created a version of the “Make it happen!” model without the generated code (“makeinhappen_blank”), which is available here: https://github.com/eclipsesource/emfforms-makeithappen-blank
As a preparation, we have just downloaded and execute Che as described in this getting started guide. So for now, we will use the released and unextended version.
When launching Che and opening it in your browser, you will first see the “Dashboard”. It enables you to create “Workspaces”, but not projects. Che starts a separate runtime for each workspace. Each can be defined as a single Docker container or a group of containers with a composed recipe. However, the default is one container per workspace. The source code and the corresponding runtime (i.e. a JDK or any other arbitrary tools) are encapsulated in that container and can therefore be shared easily. As you can see in the dashboard, there are a variety of pre-defined workspaces to chose from (also called stacks). The “Java” stack serves as a good basis to begin with.
After we have selected the workspace, Che will launch it for us. Again, technically, a docker container is launched which is pretty similar to a server-site virtual machine, we will do our development in.
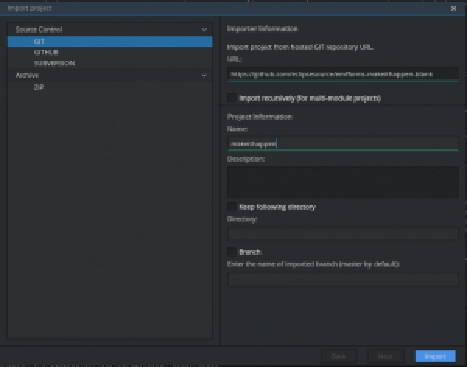
After the workspace has been started, the browser IDE connected to that workspace will be shown (currently empty). So let us get an existing modeling project into our fresh workspace. To import a project select Workspace -> Import Project. The default is to use a GIT repository, which is what we use in this example. All you need to do is paste the repository url https://github.com/eclipsesource/emfforms-makeithappen-blank and click “Import”.
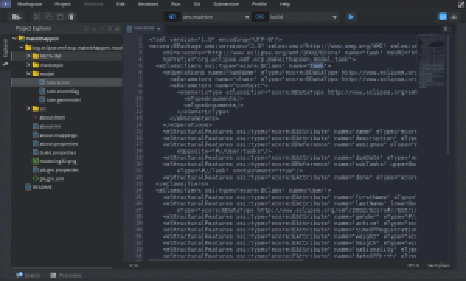
Now that we have a fully configured template project in our workspace, we can already have a look at the artifacts. As we have no custom editors yet, all files would be handled as plain text. However, we can open them and have a look:
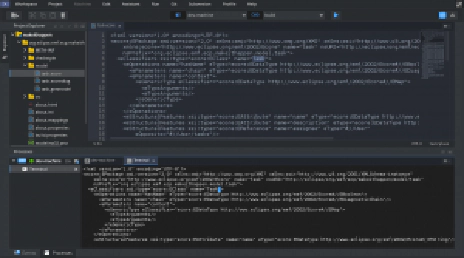
Of course modifying plain XML is not sufficient, we will have a look at creating custom editors later in this series. Another interesting thing to see at this point is that the project has been added to the underlying workspace. The console in the lower area of the Che IDE provides us direct access to it. So by typing
vi /projects/makeithappen/org.eclipse.emf.ecp.makeithappen.model/model/task.ecore
we can look at our Ecore on the console, too:
This means, any command-line based tool can also access our projects artifacts. This is an interesting extension mechanism, that we will use later in our project.
For now, as we have a simple and reproducible way of creating a template project for testing, and we can begin to look at the next requirements for EMF support in Che. It would be obvious to next create a project wizard, a custom modeling project, or a custom editor for Ecore. However, in the next part of this series, we will first enable code generation. This is mainly for risk mitigation. We believe that it is possible with some effort to create our own UI extensions for the Che IDE.
However, for the code generation, we want to use the existing code generator already provided by EMF. So is there a way to integrate existing Eclipse features into Che without much effort? Stay tuned for the next part of this series!
If you are interested in learning more about the prototype for EMF support, if you want to contribute or sponsor its further development, or if you want support for creating your own extension for Che, please get in contact with us.

Co-Author
Mat Hansen
List of all available days to date:


