Dr. Jonas Helming is CEO of EclipseSource as well as consultant, trainer and software engineer. His focus is on web-based tools, IDEs, and tailored AI assistance in tools …
EMF Client Platform: Make it Happen! Day 5
July 11, 2013 | 3 min ReadThis part of the series describes how to add custom controls to the editor of the EMF Client platform.
“Make It Happen” is an example application we are using to present the features of the EMF Client Platform. The goal of the application is to manage tasks and allow them to be assigned to users of the system.
On day 0, we created a simple model containing Tasks and Users. With this model, the EMF Client Platform has already provided a fully functioning application including a model explorer, an editor and the ability to share and version model entities (day 1). On day 2, we adapted the look of the elements, added custom icons and adapted the label. On day 3, we added a custom validation rule to our model. On day 4, we replaced the action triggered with a double click within the model explorer. Instead of opening the editor, we have sent an email directly to the user.
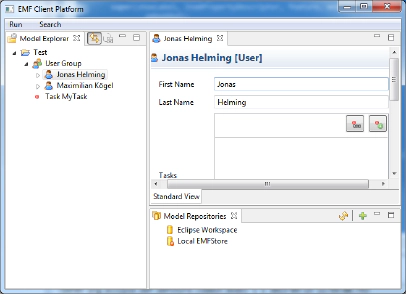
In general, the application is fully functional right from the start, allowing you to enter and browse all data. Therefore, the editor renders all attributes of the defined entities Task, User Group and User.
The editor uses built-in default controls for every attribute type. These controls are a good default, but there might be some attributes where the applied control should look a little different than the default. To meet this need, the EMF Client Platform allows developers to plug in their own controls to be used by the rendered UI.
Day 5: How add custom controls
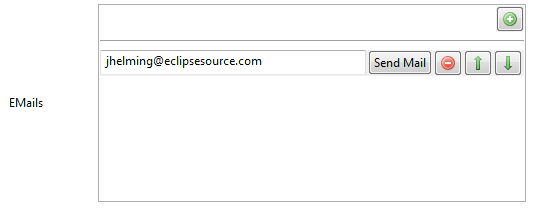
The editor of the EMF Client Platform renders EMF instances reflectively. It will create a control for each attribute depending on the type of attribute, e.g., a text field for a String attribute. The EMF Client Platform ships out-of-the-box with controls for all basic types. All controls are kept in a registry that allows developers to add their own controls. These are basically implementations of attribute fields, e.g., a drop-down box for an Enumeration attribute. The registry allows developers to define the attributes for which a certain control is used. By registering a control for a general attribute type, e.g., String, you will replace the default control completely. However, it is also possible to register controls only for specific attributes or specific classes. In the “Make It Happen” example application, there is a multi-attribute email type of String. Currently it is displayed as a plain text field. It would be nice if the control also allowed the user to send an email directly to an email address just by clicking on a button within a control. This tutorial shows how to extend the existing String control by such a button and register it only for the email attribute. As a result, the editor will render the email attribute like this:
Please follow this link to get to the detailled tutorial describing to to add custom controls.
Please use the links below to see all posts in this series:

