Developing RAP applications with Virgo
This post shows how to develop RAP applications with Virgo. The first part guides you through the setup for a Virgo Server instance and how to extend it to become a RAP runtime. The second part is a short walkthrough of how to create a Hello World RAP application using the new RAP OSGi integration.
Extend Virgo Kernel 3.0 to support the RAP Widget Toolkit 1.5
Setup has become easier with the use of Jetty 8.1.3 and the RAP OSGi integration. If you’re using Virgo 2.1.x and RAP 1.4 please follow the instructions How to extend the Virgo Jetty Server to support the RAP Widget Toolkit[1] and Running RAP on Virgo[2].
In the following installation we will provide a RAP runtime based on Virgo using an HttpService provided by Jetty. The runtime is built on top of a Virgo Kernel. Jetty, the HttpService and RAP are added as extensions described in plan artifacts[3]. These plans are added to the list of initial artifacts. Let’s get started:
Download Virgo Kernel 3.0.3.RELEASE from Virgo Releases[4] and install VK to a location of your choice. This location will be referenced as ${VIRGO_HOME} throughout the next steps.
The following bundles from the Jetty and Equinox project provide an OSGi HttpService:
org.eclipse.jetty.continuation_8.1.3.v20120522.jar
org.eclipse.jetty.http_8.1.3.v20120522.jar
org.eclipse.jetty.io_8.1.3.v20120522.jar
org.eclipse.jetty.security_8.1.3.v20120522.jar
org.eclipse.jetty.server_8.1.3.v20120522.jar
org.eclipse.jetty.servlet_8.1.3.v20120522.jar
org.eclipse.jetty.util_8.1.3.v20120522.jar
javax.servlet_3.0.0.v201112011016.jar
org.eclipse.equinox.http.jetty_3.0.0.v20120522-1841.jar
org.eclipse.equinox.http.servlet_1.1.300.v20120522-1841.jar
Another two bundles for the RAP widget toolkit and it’s OSGi integration.
org.eclipse.rap.rwt_1.5.0.20120612-1458.jar
org.eclipse.rap.rwt.osgi_1.5.0.20120612-1458.jar
The easiest way to get all those bundles is to download the RAP runtime. Otherwise please visit the projects download pages listed below:
Copy all the listed bundles into ${VIRGO_HOME}/repository/ext to make them available for use in plan artifacts. To extend the core functionality of Virgo add the plan artifacts jetty-8.1.3.plan[8] and rap-1.5.0.plan[9] next to the downloaded bundles into ${VIRGO_HOME}/repository/ext.
Add the two plan artifacts describing your extensions to the list of initial artifacts to your ${VIRGO_HOME}/config/org.eclipse.virgo.kernel.userregion.properties.
# the next line must not be broken with back-slashes
initialArtifacts = repository:plan/org.eclipse.virgo.kernel.userregion.springdm,repository:plan/org.eclipse.jetty,repository:plan/org.eclipse.rap.rwt
NOTE: On Unix systems access to the HttpService default port is restricted (<1024). The HttpService port can be easily configured by adding a line similar to
org.osgi.service.http.port=18080
to the {VIRGO_HOME}/lib/org.eclipse.virgo.kernel.launch.properties. This is described in detail in the blog post, “Extending Virgo with a HttpService.”[10]
Fire up the Virgo instance by running ${VIRGO_HOME}/bin/startup.sh with the two new extensions and look for the script that shows that the plans defining the two extensions have been started:
[2012-06-19 17:44:36.248] start-signalling-1            Started bundle 'org.eclipse.equinox.http.jetty' version '3.0.0.v20120522-1841'.
[2012-06-19 17:44:36.249] start-signalling-1            Started plan 'org.eclipse.jetty' version '8.1.3'.
[2012-06-19 17:44:36.361] system-artifacts              Installing plan 'org.eclipse.rap.rwt' version '1.5.0'.
[2012-06-19 17:44:38.255] system-artifacts              Installing bundle 'org.eclipse.rap.rwt' version '1.5.0.20120605-1606'.
[2012-06-19 17:44:38.324] system-artifacts              Installing bundle 'org.eclipse.rap.rwt.osgi' version '1.5.0.20120605-1606'.
[2012-06-19 17:44:38.391] system-artifacts              Installed bundle 'org.eclipse.rap.rwt' version '1.5.0.20120605-1606'.
[2012-06-19 17:44:38.394] system-artifacts              Installed bundle 'org.eclipse.rap.rwt.osgi' version '1.5.0.20120605-1606'.
[2012-06-19 17:44:38.396] system-artifacts              Installed plan 'org.eclipse.rap.rwt' version '1.5.0'.
[2012-06-19 17:44:38.451] system-artifacts              Starting plan 'org.eclipse.rap.rwt' version '1.5.0'.
[2012-06-19 17:44:38.455] system-artifacts              Starting bundle 'org.eclipse.rap.rwt' version '1.5.0.20120605-1606'.
[2012-06-19 17:44:38.461] start-signalling-1            Started bundle 'org.eclipse.rap.rwt' version '1.5.0.20120605-1606'.
[2012-06-19 17:44:38.465] system-artifacts              Starting bundle 'org.eclipse.rap.rwt.osgi' version '1.5.0.20120605-1606'.
[2012-06-19 17:44:38.629] start-signalling-1            Started bundle 'org.eclipse.rap.rwt.osgi' version '1.5.0.20120605-1606'.
[2012-06-19 17:44:38.631] start-signalling-1            Started plan 'org.eclipse.rap.rwt' version '1.5.0'.
[2012-06-19 17:44:38.634] sync Event Dispatcher Thread  User region ready.
Hello Virgo World
Now that the Virgo/RAP runtime is prepared it’s a good time to setup your Eclipse / Virgo tooling[11]. Then, you can follow the step by step guide to get the demo up and running on your own computer. This demo has been written using Spring Tool Suite 3.0.0.M2 with Eclipse Virgo Tools installed.

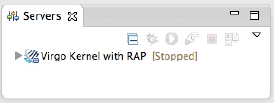
Use the Virgo Tools to create a Server definition pointing to the Virgo Kernel prepared in the section above.
Create a new OSGi bundle project with the New Bundle Project wizard as shown in the screenshot below. 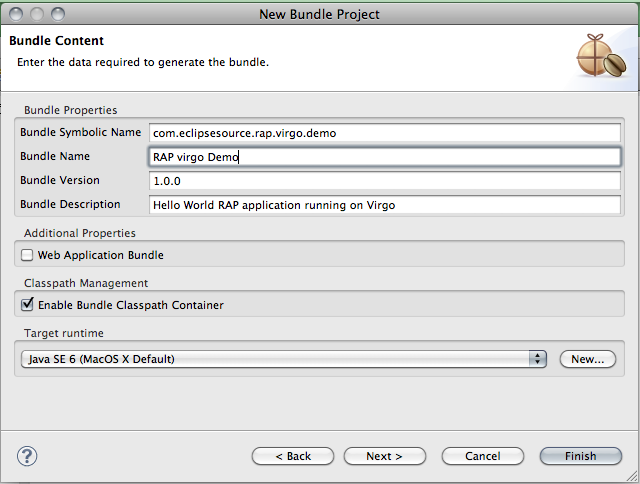
Find your Server in the Server view and open the context menu to “Add and Remove…” the created bundle project or simply drag’n’drop the project onto your freshly created server definition.
[ Using RAP or Virgo in an industrial setting? Our technology subscriptions secure your investment for years to come. | More on RAP from our blog: RAP technology overview ]
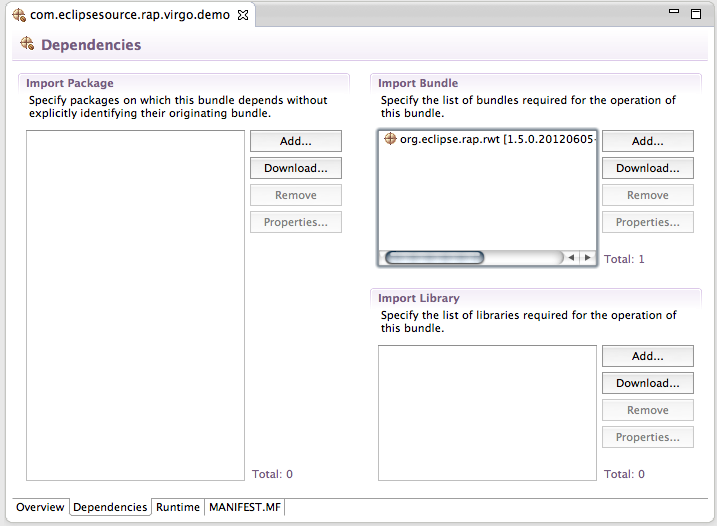
A final small step and we can start programming the actual RAP demo application. Make RWT known to your bundle by adding it as a dependency. The infrastructure bundle org.eclipse.rap.rwt.osgi is not a necessary dependency. It just works in the background and will connect our application to the HttpService once we have added our ApplicationConfiguration.
Now it’s time for some Java hacking. Create a demo application,
public class DemoApplication implements IEntryPoint {

 @Override
 public int createUI() {
  Display display = new Display();
  Shell mainShell = new Shell(display, SWT.TITLE);
  mainShell.setText("RAP Virgo Demo");
  mainShell.setMaximized(true);
  mainShell.setLayout(new GridLayout());

  Button button = new Button(mainShell, SWT.PUSH);
  button.setText("Hello Virgo world!");

  mainShell.layout();
  mainShell.open();
  return 0;
 }
}
and a basic configuration:
public class DemoApplicationConfiguration implements ApplicationConfiguration {

 @Override
 public void configure(Application application) {
  Map properties = new HashMap();
  properties.put(WebClient.PAGE_TITLE, "RAP Virgo Demo");
  application.addEntryPoint("/virgo_demo", DemoApplication.class, properties );
 }

}
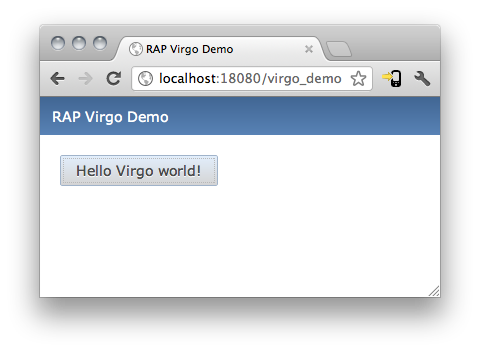
The demo application as well as the configuration should be self explanatory. We expect to see a button “Hello Virgo world!” registered at the web context path “/virgo_demo” in a browser with the title “RAP Virgo Demo.” To make this happen we simply need to register our DemoApplicationConfiguration as an OSGi service.
There are many ways to do this. In this demo we create a Spring application context to register the configuration for us.
Create a new “Spring Bean Configuration File” with:
- A configuration bean
- and an OSGi service referencing the configuration bean.
If your server is already running, saving this file will automatically trigger a redeployment of the demo bundle. The org.eclipse.rap.rwt.osgi bundle will do the necessary steps and register the demo application at the HttpService that is already running. You should be able to observe a successful deployment in the Console view:
[

Check the result at localhost:18080/virgo_demo … Congratulations! You successfully deployed your first RAP application on Virgo!
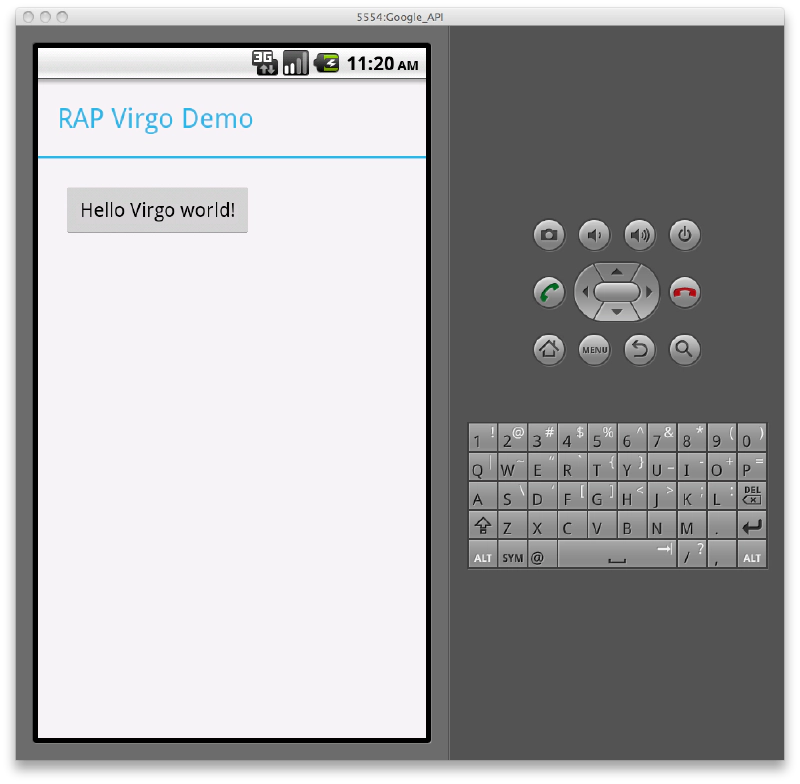
 If you are curious enough, extend your RWT extension with Tabris[12] and enjoy your demo app on mobile devices without changing a single line of code…
Running the demo on an Android device without changing a line of code
Install two more bundles in your Virgo server and replace your RAP extension plan with the following Tabris variant:
Do not forget to update the VK configuration and replace the initial artifact org.eclipse.rap.rwt with com.eclipsesource.tabris.
Restart your server to pick up the Tabris extension instead of plain RAP, then fire up your Tabris profile[13] and you’ll be able to see the Android version of the demo application.
[
Get the source of the rap-virgo-examples and enjoy developing RAP applications for Virgo.
--
[1] How to extend the Virgo Jetty Server to support the RAP Widget Toolkit [2] /blogs/2010/10/28/running-rap-on-virgo/ [3] https://www.eclipse.org/virgo/documentation/virgo-documentation-3.0.0.x/docs/virgo-programmer-guide/html/ch04s03.html [4] Virgo Releases - https://www.eclipse.org/virgo/download/ [5] Jetty Distributions from Eclipse - https://www.eclipse.org/jetty/downloads.php [6] Equinox Integration Build: 3.8 - https://download.eclipse.org/equinox/drops/R-3.8-201206081400/index.php [7] Eclipse RAP downloads - https://eclipse.dev/rap/downloads/ [8] Jetty 8.1.3 plan artefact- https://download.eclipsesource.com/~fwaibel/virgo/jetty-8.1.3.plan [9] RAP 1.5 plan artefact - https://download.eclipsesource.com/~fwaibel/virgo/rap-1.5.0.plan [10] Extending Virgo with a HttpService - https://codewax.org/osgi/extending-virgo-with-a-httpservice/ [11] Virgo/Tooling https://wiki.eclipse.org/Virgo/Tooling [12] Tabris - http://developer.eclipsesource.com/tabris/ [13] Tabris profile - http://yoxos.eclipsesource.com/userdata/profile/9b581113715eee8f5ac61b12ec08dd1d