RAP Deployment - Part 1: Deploying your application with Jetty
This post is out of date for RAP 1.2 (Galileo).
-–
When it comes to deploying your RAP Application you have two options: you can either put the web server inside the OSGi runtime (Equinox + Jetty + RAP + your app) or you can put the OSGi runtime inside an existing server (.war file with the Servlet Bridge + Equinox + RAP + your app).
I recently spent some time exploring both options and found the process of “getting it right” intimidating (at least the first time). To give you a head start I’ll share my experiences. If you find a simpler way of doing this let me know ;-).
Update 2008/8/11: note that this instructions are NOT accurate for deploying RAP 1.1 with Eclipse 3.4. According to the mailing list there are at least two changes: These projects should not be opened in your workspace: javax.servlet, org.apache.commons.logging, org.eclipse.equinox.http.jetty, org.eclipse.equinox.http.registry, org.eclipse.equinox.http.servlet, org.mortbay.jetty. And you now *have* to use the ConfigIniCreator to create a valid config.ini file. I will schedule some time to do an fully updated re-post of this tutorial in August.
Part 1: Deploy with Jetty inside Equinox
This is the same technique used by the RAP launcher to start your application when you launch it from inside Eclipse (a.k.a “self-hosting” deployment). We will create a set of plug-ins containing Equinox (OSGi)pl, Jetty, RAP, your application and the Equinox launcher.
Watch the screencast (approx. 7 minutes) or read-on for more details.
Below are the steps shown in the screencast. You can also download the calculator’s source code here.
- Create a feature for your application
- Add the all dependencies of your application to it (e.g. RAP and all the plug-ins you use)
- Add the Jetty server to your feature as explained in “Embedding an HTTP server in Equinox”. You ’ll need these plug-ins:
- org.eclipse.equinox.http.jetty
- org.eclipse.equinox.http.servlet
- org.mortbay.jetty
- org.apache.commons.logging
- javax.servlet
- org.eclipse.equinox.http.registry
- Export the feature using “File > Export > Deployable features”
- Copy the Update Configurator (provides auto-discovery of plug-ins) and the Equinox Launcher to the deployment directory, as explained in the “Equinox Quickstart Guide”. You’ll need to copy those files to the locations listed below. You can get the files from your Eclipse installation.
- your_deployment_direclipse.exe
- your_deployment_dirpluginsorg.eclipse.equinox.launcher_…jar
- your_deployment_dirpluginsorg.eclipse.equinox.launcher.win32.win32.x86_… (with sub-directories, this will be named different on other platforms)
- your_deployment_dirpluginsorg.eclipse.update.configurator_…jar
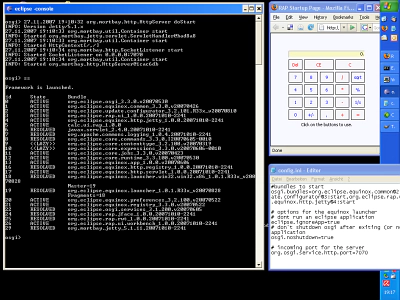
- Create the file _your_deployment_dir configurationconfig._ini as shown:#bundles to start osgi.bundles=org.eclipse.equinox.common@2:start,org.eclipse.update.configurator@3:start,org.eclipse.rap.ui@4:start,org.eclipse.equinox.http.jetty@4:start# options for the equinox launcher # do not run an eclipse application eclipse.ignoreApp=true # don’t shutdown osgi after exiting (or not running) the application osgi.noShutdown=true # incoming port for the server org.osgi.service.http.port=7070
- Go into your_deployment_dir and launch:eclipse -console
- Type “ss” on the OSGi console. If you have unresolved (=INSTALLED) bundles, you missed some dependencies. Also check the .log file under _your_deployment_dir_workspace.metadata.log. If you see something other than “Authorization infrastructure (org.eclipse.core.runtime.compatibility.auth) not installed” you probably missed some dependencies. In my case I ignored the aforementioned message because I don’t need that optional plug-in in my deployment.
- Your app should now be reachable under:https://localhost:7070/rap
Come back next week to find out how to deploy this application as a .war file.
