Your own JavaScript mobile app with Tabris.js in 10 minutes
 One of the things we live at EclipseSource is efficiency. This is true for IDE usage, code and development lifecycles. This is why we made the Tabris.js development lifecycle as fast as possible with the Tabris.js 0.9.3 release. The mission for this release was that we wanted to enable you to:
Build your own branded app, without owning build hardware. Be able to develop JavaScript apps without rebuilding your app every time your JavaScript code changes.
Today we can proudly say: “Mission accomplished!”. In this post we will show you how to get started with Tabris.js, how to create your first app, how to build your first app and how to integrate your own set of Apache Cordova plugins. So, let’s get our hands dirty.
Prerequisites
What you need to follow this tutorial is…
- a mobile device like a smartphone (iOS or Android),
- a GitHub account
- a text editor
- a npm installation
Getting started
To see your first app and hack around you only need two things. First you need to sign in to tabrisjs.com using your GitHub account. Right after the signin you will see your personal “Scratchpad” - an online editor containing your first executable Tabris.js app.
The second thing is to download the Tabris.js app from the Apple AppStore or from Google Play. Already got it?! Perfect…
[

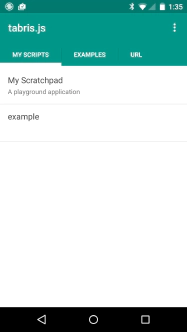
When you start the app you can also sign in to tabrisjs.com right within the app. After doing so you will see an entry in the “My Scripts” tab called “My Scratchpad”. Clicking on this entry will launch your Scratchpad. This is it, your first app is running! Go ahead an change some code in your Scratchpad within your browser (it saves automatically). To see your changes on the device the only thing you need to do is to swipe from the right border of the Tabris.js app to the left. You will see a “reload” button on the top right and press it! Done? Awesome… So, what happens in the background and how does this work?
The app you are currently using is written with Tabris.js. Basically it’s just a launcher for your Tabris.js apps. The scratchpad is actually a virtual app. Virtual means it publishes the JavaScript code via HTTP under the hood. When clicking on the Scratchpad entry within the app, the app loads and executes the JavaScript you have written. Pressing the reload button does the same thing, just reloading the JavaScript.
The Scratchpad is cool to see your first small app, but how do you develop a bigger and more advanced app?
Your own project
What the Scratchpad does can also be done easily on your local computer. Just create a folder called my-tabrisjs-app with two files:
-
The app itself comes first. Create a file called
app.jswith the following content:var page = tabris.create("Page", { title: "Hello, World!", topLevel: true }); var textView = tabris.create("TextView", { font: "24px", layoutData: {centerX: 0, top: 100}, text: "Hello World" }).appendTo(page); page.open(); -
Describe the app with a
package.jsonfile. Tabris.js is fully compatible with npm and thus every app needs to describe itself in apackage.json.{ "name": "my-app", "description": "My first Tabris.js app", "main": "app.js", "dependencies": { "tabris": "0.9.3" } }
The rest is really simple and you are only two steps away from launching your first app. The first step is to add the missing Tabris.js JavaScript parts. Just step into the my-tabrisjs-app folder and execute npm install. After this has finished you just need to make the my-tabrisjs-app folder available via HTTP. You can use an Apache Web-Server, Jetty or (our preferred) npm http-server. Simply install the http-server executing npm install http-server and execute http-server afterwards. This makes the current folder available via HTTP on port 8080.
After the server is up and running you can open the Tabris.js app on your mobile device and select the “URL” tab. Just enter the IP of your computer with port 8080 e.g. https://192.168.1.1:8080. Congrats, your app is up and running :).
Does this mean you have to make your JavaScript code available on a server all the time? No, when you deliver an app for production use, all JavaScript and resources will be packaged within the app ready for offline usage. The HTTP approach is only used during development time: this is what we call the fast development lifecycle.
Development lifecycle
Making your JavaScript available using HTTP during development time allows you to make very fast development iterations. This is because you don’t need to build a runnable app every time your JavaScript code changes like it is with other frameworks. In Tabris.js you can always swipe from the right to the left and press the reload button. This will reload the current application. In our case, the application we have made available using the http-server.
You may think: “This is nice, but I also want to see my own app ID, logos and use own plugins in the app”. That’s not a problem at all and you can go even further! Tabris.js has full support for Apache Cordova Plugins. So, instead of developing new features on your own, you may want to use one of hundreds of freely available Cordova Plugins. And the coolest thing is, you can achieve all this without the need to use your own hardware (and no, you don’t even need a Mac to build your iOS app).
Build your app
You may have already spotted it after you signed in to tabrisjs.com. Not far from the “My Scratchpad” menu entry is an entry called “My Apps”. Under “My Apps” you can build your Tabris.js apps. To build our app we need to do two things.
First we need to change the project structure. As mentioned before, Tabris.js has full support for Apache Cordova Plugins. This support goes even further. Tabris.js apps can be build using the Cordova CLI which also means you can script all kinds of Cordova build hooks. Anyway, to be able to build an app on tabrisjs.com the project needs to have a Cordova project structure. Basically this means two things:
-
All your JavaScript code and the
package.jsonneed to be in a folder calledwww. So, create thewwwfolder in yourmy-tabrisjs-appfolder and move all files created so far into this folder. -
You need to create a
config.xmlfile that describes the app. You may think: “Another app description, wtf?”. But hold on, theconfig.xmldescribes the native artifacts that will be built (.ipa/.apk) while thepackage.jsondescribes your JavaScript application e.g. which dependencies the app has and so on. So, go ahead an create aconfig.xmlfile in themy-tabrisjs-appfolder right beside thewwwfolder with the following content:My App My first Tabris.js app Me
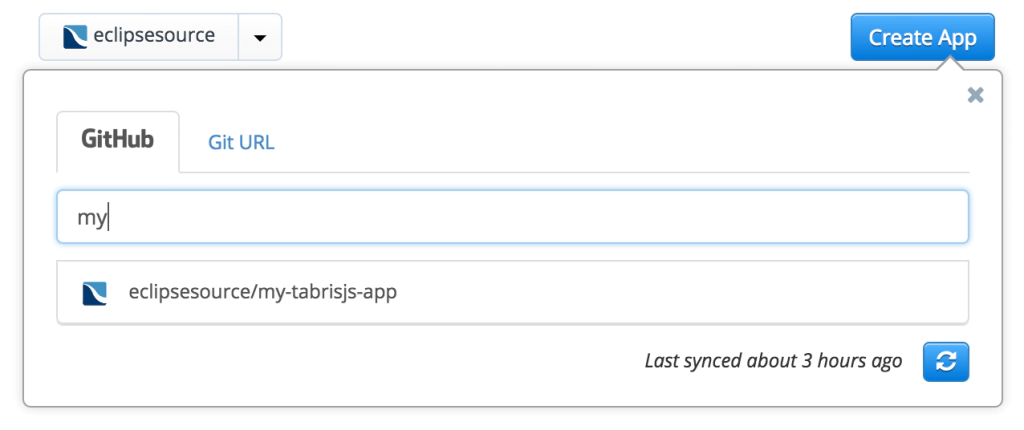
Second, we need to make this app available on GitHub to be able to activate it on tabrisjs.com. Go ahead and create a GitHub repository called my-tabrisjs-app and push all files to this repository (for the experienced JS developers: yes, you can .gitignore the node_modules folder). After you have pushed it, go to “My Apps” on tabrisjs.com and press “Create App”. Now you can select your my-tabrisjs-app repository in the list of repositories (if it’s not visible you may need to press the “synchronize” button).
After you have selected your repository it’s going to be validated. The validation checks if the selected repository contains a valid Tabris.js app. If you have done all steps as described before, your app should become valid shortly. If it’s invalid, the site will tell you what went wrong. In this case please follow the instructions displayed or double check the previous steps.
After your app has become valid, you are ready to execute your first build. Just select the newly created app and click the “Start Build” button. A few minutes later you will get an Android .apk file which is ready to be installed on your device. Yay! But what about iOS? What about production builds? And what about signing?
To answer these questions we need to take a look at the settings of your app. Let us take a detailed look on every option.
- Repository URL: This is the URL pointing to your repository. In your case it should point to the
my-tabrisjs-appGitHub repository. Users who are on the Developer plan can also use private GitHub repositories and custom repository locations. - SSH Private Key: The SSH private key to use when cloning your repository. Only relevant if you have the developer plan and using a custom git repository URL.
- Branch: The git branch to build from. The default value of this is
master. But sometimes you may also want to build a feature branch or something similar. So, go ahead and configure it here. - iOS Signing Key: iOS apps can not be deployed to a mobile device without being signed. If you want to build an iOS app you need an Apple Developer account and provide the certificate together with the provisioning profile. A very good tutorial how to get these files can be found in the Phonegap Build documentation.
- Android Signing Key: Android apps needs to be signed with a certificate only if you want to deploy them to Google Play. If this is the case you can find a very good tutorial in the Phonegap Build documentation as well.
- Tabris.js Version: This is the Tabris.js version the app should use. In your
package.jsonyou have configured a dependency to “tabris” using version “0.9.3”. This will load the Tabris.js npm module and provide the JavaScript APIs. The Tabris.js version that can be configured here is the “client version”. This means the native parts that will interpret your JavaScript code are also available in different versions like the JavaScript API. In most cases the value “latest” is good enough here. But if you want to stick to a fixed Tabris.js version you can configure it here. - Debug: The debug flag tells the build service which “version” of the app should be built. Debug
ONmeans your app will be built including debug symbols and it will be packaged into the Tabris.js app you have used before. This allows you to use all the benefits like the fast development lifecycle also with your own app. Please be aware that debug versions can not be submitted to the app stores. DebugOFFmeans your app will be built to be ready for release. No developer app, no console, no fast development lifecycle! The only thing that gets executed is your JavaScript code.
Add Cordova Plugins
To add any set of Apache Cordova Plugins the only thing you need to do is to change the config.xml. We support the <gap:plugin tag as you might know it from Phonegap Build. This means you can add the plugins using an ID, HTTP or git URL. A sample config.xml including two Cordova plugins can look like this:
...
Please Note: If not already included like in the examples above, you also need to add the gap XML namespace in the root element of your config.xml file.
Further Reading
To see how to brand your app checkout our blog tomorrow. If you want to know more about Tabris.js checkout the documentation and snippets. Please feel free to leave a comment or any kind of feedback.


