Step by Step: How to bring JAX-RS and OSGi together
Most of the server-side Java systems I built over the last years had the following requirements: They should be modular to be highly extendable and of course they should have a REST API to lower the integration barrier for other systems.
If you have similar requirements you probably choose two standards/technologies. For the modular part it’s definitely OSGi at the moment and for the REST API part you probably go with JAX-RS. Both, OSGi and JAX-RS are standards and for that reason they have many implementation vendors. But this is a good thing because if you use only standardized things you can exchange the implementation any time without feeling much pain. The problem with using two or more standards is how to integrate them without messing up the system’s architecture?
For OSGi and JAX-RS many ways exist on how to integrate them. But I always preferred the idea to integrate them on the OSGi service layer. It just feels natural and right to me. Integration on this layer means to publish @Path annotated resources as OSGi services and let someone else publish them as REST services. So, the question is how to do it?
With this post I want to give you a step by step guide of one solution. I’m going to use Eclipse as my IDE, Equinox as the OSGi implementation and Jersey as the JAX-RS implementation. For the glue that brings OSGi and Jersey together I’m going to use the OSGi-JAX-RS Connector. This connector is basically just a bundle you need to start which publishes OSGi services as REST services. It uses the OSGi HttpService for publishing, thus it’s all standard conform. But enough theory, let’s get our hands dirty.
Setup
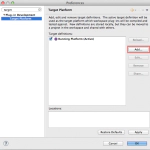 “Target Platform”. To add a new target click the“Add…”_ button.
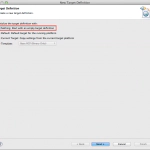 This will open a wizard where you can select “Nothing: Start with an empty target definition” because we compose it our self ;).
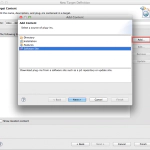 Now it’s time to gather our runtime. Basically this means adding the software sites (p2 repositories) of Equinox and the JAX-RS Connector. To do this click the “Add…” button again.
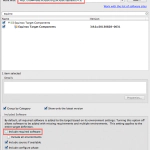 The first thing we want to add is an Equinox version. For this tutorial I will use the released version that comes with Eclipse Kepler (4.3) which is Equinox 3.9. To add it paste the URL "https://download.eclipse.org/eclipse/updates/4.3" in the “Work with:” field and press enter. After the target was fetched you can filter it and type in “equinox”. As you can see you can select “Equinox Target Components” which basically is the whole Equinox (Core + Compendium + Extras). One important step is to deselect the “Include required software” checkbox to not fetch any optional dependencies.
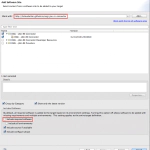 Now we want to add the OSGi-JAX-RS Connector. The cool thing is that this connector already bundles the Jersey implementation. So, you just need to repeat the same steps as you did while adding Equinox. But the URL this time is "https://hstaudacher.github.io/osgi-jax-rs-connector". After the target was fetched select the “OSGi - JAX-RS Connector”. Also remember to deselect “Include required software”.
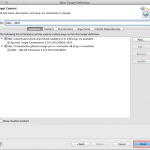 The next thing we need to do is to set this target. For this reason click “Finish” on the “New Target Definition Dialog” and select the new Target in the “Target Platform Preferences”.
Creating the Application
The setup is complete now. So, we can start to create our application. Basically our simple app is only one bundle.
- [
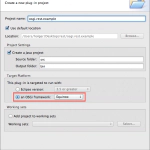 “Plug-in Project”within the“File”menu. When the wizard opens you need to enter a bundle name. I will go with“osgi.rest.example”this time. One important step is to choose the right target setup here. So, change it from“Eclipse Version X”to“an OSGi framework”and select“Equinox”_.
 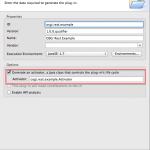 On the next page we need to select “Generate an Activator…” because we need it to register a service later (you can also use DS but for this tutorial we will go with programatic service registration). After selecting the checkbox click “Finish”.
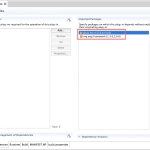 To create a JAX-RS based service we first need to add the imports of the JAX-RS API. For this tutorial this is only one package. So, open up the MANIFEST.MF of the newly created project and open the “Dependencies” Tab. Here you can add the package “javax.ws.rs” which is basically the core of the JAX-RS API. This package is available because you have composed the right target during the setup ;). Don’t forget to save the file and close it.
[ Running a mission-critical system? Keep it running smooth with our Production Support. | Find more tools to hack your workflow: Eclipse Tools. ]
Coding
Now it’s time to hack some code. The first thing we need is our REST service implementation. For this reason I will create a new Java Class called “osgi.rest.example.ExampleResource”. The implementation is quite simple. It consists of only one method that is called during a GET request.
After our service is implemented we need to register it as an OSGi service. To do this we need to implement our “Activator” that was created during the project creation. The implementation needs to look like this:
Launching
After we have done the “hard” coding work it’s time to let our application fly. For this reason we need to create a “Launch Configuration” (short “Launch Config”). A Launch Config basically defines which bundles are started on defined start levels.
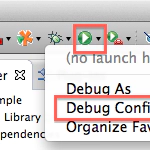 To create one you need to open the “Debug” or “Run” menu from the toolbar and click “Debug/Run Configurations…”.
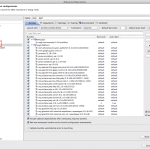 This opens the Launch Config Dialog were you can add a new “OSGi Framework” configuration. I have named mine “OSGi - REST”. Within the “Bundles” Tab we need to select the bundle we want to start. Basically all we want to start is OSGi, Jersey, and the Connector. Also a console would be nice to see status message and type commands. These four things consists of several single bundles because they are also build modular. The complete list of bundles you need to select has to be this one:
# Our Application osgi.rest.example
The OSGI implementation
    org.eclipse.osgi
    org.eclipse.osgi.services
The OSGi console
    org.eclipse.equinox.console
    org.apache.felix.gogo.command
    org.apache.felix.gogo.runtime
    org.apache.felix.gogo.shell
The OSGi HttpService implementation
    org.eclipse.equinox.http.jetty
    org.eclipse.equinox.http.servlet
    org.eclipse.jetty.continuation
    org.eclipse.jetty.http
    org.eclipse.jetty.io
    org.eclipse.jetty.security
    org.eclipse.jetty.server
    org.eclipse.jetty.servlet
    org.eclipse.jetty.util
    javax.servlet-api
The JAX-RS Connector
com.eclipsesource.jaxrs.publisher
Jersey
com.eclipsesource.jaxrs.jersey-all (this is Jersey repackaged as a single bundle)
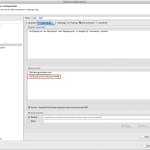 After adding all needed bundles we need to define the port the server runs on. To do this we need to switch to the “Arguments” Tab and add an additional “VM argument”. The name of the argument also comes from the OSGi specification and is called “org.osgi.service.http.port”. I will use Port 9090. After you have set the port click “Debug/Run”.
Verification
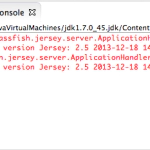 If you have done everything as described in the last steps you should see an OSGi console with some messages on it now. The messages come from Jersey and they are telling you that the service was registered.
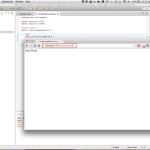 To check if your service is available you can use curl, any HTTP-Client or simply the browser. You need to enter the URL "https://localhost:9090/services/hello". If everything works you will receive the message “Hello World” which comes from your “ExampleResource” implementation.
Additional Reading
That’s it for the tutorial. If you plan to build your application on this stack of technology you may want to know what the OSG-JAX-RS Connector provides besides publishing, right? Besides @Path resources you can also register @Provider_s to hook serialization. For this reason it brings ready-to-use providers with Gson and Eclipse Moxy. Besides this it also comes with an OSGi friendly integration of the JAX-RS Security features and a@Provider_ to enable SSE. Just take a look at the examples located in the connector’s git repository to see how to use all this stuff.
I hope this tutorial gets you started and you will create awesome REST APIs using OSGi and JAX-RS. As always, feel free to comment and let us know if you face any problems we can eliminate.