Jonas Helming is co-lead for the EclipseSource team and the project lead of the Eclipse EMF Client Platform and the EMFStore project. He works as an Eclipse Consultant …
EMF Client Platform: Make It Happen! Day 2
June 20, 2013 | 2 min ReadThis part of the series describes how to customize the look of model elements in the UI of the EMF Client platform.
“Make It Happen” is an example application we are using to present the features of the EMF Client Platform. On day 0, we created a simple model containing Tasks and Users. With this model, the EMF Client Platform has already provided a fully functioning application including a model explorer, an editor and the ability to share and version model entities (day 1).
Based on this first application, our goal is now to iteratively adapt it. On day 2, we want to add the first visible adaptation to our application:
Day 2: Customize the Look of Model Elements
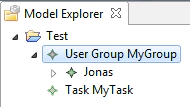
Anywhere a model element is displayed in the EMF Client Platform application, the default EMF item provider is used. Therefore, the look of elements is always the same, e.g.,:
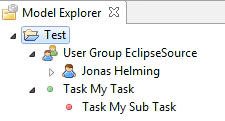
A default icon and text for model elements is a very handy feature to get started, but in most scenarios, this look needs to be replaced quickly with custom icons and an adapted label. This tutorial describes how to replace the default icons, how to adapt the label and how to influence the visible children in tree views. It will enable you to define a custom look and feel:
Please follow this link to the tutorial.
Please use the links below to see all posts in this series:


